
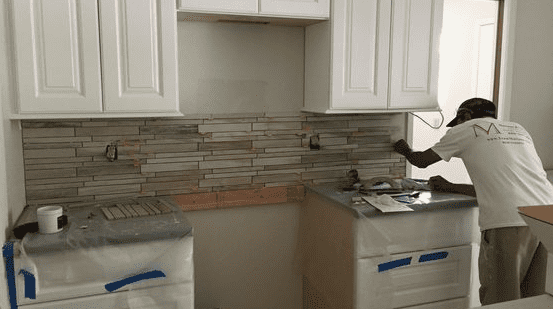
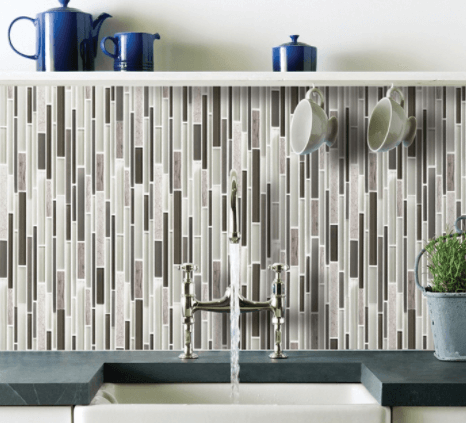
A tile backsplash is a great way to add a touch of shine or a splash of color to your kitchen. With most tile materials, installing a backsplash requires an intermediate skill level and can be done by most DIYers with a bit of preparation. Follow these tips and instructions to ensure your bathroom or kitchen backsplash is installed properly, so you can enjoy it for years to come.
Step 1: Prepare for Installation
To prepare your kitchen for a backsplash installation, start by turning off the power to the kitchen and removing outlet covers and light-switch plates in the area you’ll be tiling. Use painter’s tape to protect surrounding countertop edges, cabinets, and outlets.
Fill any holes or large cracks with joint compound. If the walls are painted (especially with a high-gloss paint), sand the area to create a surface rough enough for the tile to adhere to.
In areas without countertops to support the bottom edge of your backsplash (such as the spaces your freestanding appliances occupy), you’ll want to attach a temporary ledgerboard. This helps keep your tiles level during installation before the adhesive dries. Use a piece of wood at least as deep as the tiles are thick, and be sure to use a level while installing it.
Once the area has been prepared, plan your tile layout and cut as needed. Keep in mind that your tile backsplash needs a 1/8-inch expansion gap on the top and bottom. It can be helpful to plan your layout by arranging the dry tiles on the countertop in front of the backsplash area. When horizontal cutting is required, it’s best to cut the topmost tiles where possible, so they’ll be hidden under the cabinets.
Step 2: Attach the Tile
Follow the instructions on your container of tile mastic or thinset to mix the product. Then use a drywall trowel to spread it on the wall. Start with a small section at first to prevent the adhesive from drying too soon. Then, using a notched trowel, comb grooves into the adhesive. In small areas that are hard to reach with the trowel, apply adhesive to the back of the tile.
Now it’s time to start attaching your tiles. If your layout has a vertical border, start there. Otherwise, begin with the bottom row at the center of your backsplash tile. Remember to use spacers beneath the bottom tiles to leave an expansion gap. Attach tiles by pressing them firmly into the adhesive.
Once you complete the bottom row, work upward from there. This is the best way to ensure your backsplash tiles remain level. Use spacers (also known as lugs) at the corners of the tiles to keep your grout lines even while the adhesive dries.

Step 3: Apply Grout
Allow your mastic/thinset to dry completely, for 24 hours or as long as the manufacturer recommends. At this point, you can remove any spacers, wipe down the tile with a damp sponge, and begin the grouting process.
Use unsanded grout for gaps that are 1/8-inch or less. For larger gaps, choose sanded grout. Once you’ve mixed the grout per the manufacturer instructions, begin applying it with a rubber float. Work diagonally across the tile, at approximately a 45-degree angle to the grout lines. There’s no need to grout the bottommost gap where the tile meets the countertop—this seam should be filled with caulk.
Using the rubber float, make sure all grout lines are filled in. Remove excess from the face of the tiles with a damp sponge after allowing the grout to set for about 10 minutes. Avoid getting the grout too wet during this process, and wipe diagonally with light pressure to avoid removing grout from the joints. If a slight haze remains on your tiles, it can be removed later with a haze remover.
Let the grout dry for about 24-48 hours or as long as the manufacturer specifies. Once it’s dry, apply grout sealer. Finally, fill the expansion gap along the bottom of the backsplash with a line of caulk or silicone sealant.
Step 4: Finishing Touches
To complete your backsplash, you may need to add box extenders to your electrical outlets and light switches to make them flush with the tile. Then, simply replace covers and plates, and enjoy your brand new tile backsplash!
Get some great DIY design ideas with the Just Design Visualizer from Arizona Tile.
Filter by Category
Select category
- Pavers
- New Products
- Basement Design
- Bar Tile
- Boise Location
- Large-format
- Wall Tile
- Patterned Tile
- Shower Tile
- Outdoor Tile
- R11 Anti-Slip
- 3D
- Limestone
- Quartzite
- Konkrete Tile
- Stonework Cladding
- Palm Desert Arizona Tile
- Anaheim Tile Showroom
- Glass Tiles
- Slab
- Fireplace
- Albuquerque Arizona Tile
- Uncategorized
- Scottsdale Arizona Tile
- Natural Stone
- Family Living Room Projects
- Van Nuys Arizona Tile
- San Marcos Arizona Tile
- Mudroom Entryways
- Exterior Tile & Slab Projects
- Tucson Arizona Tile
- San Diego Arizona Tile
- Mosaics
- Exterior Stone Projects
- Travertine Tile & Slabs
- Samsung Radianz Quartz
- Mission Viejo Arizona Tile
- Dining Room Tiling Projects
- Tile & Slab Remodeling
- Salt Lake City Arizona Tile
- Miramar Natural Stone Slab Warehouse
- Denver Arizona Tile
- Tile & Slab New Products
- Roseville Arizona Tile
- Miramar Arizona Tile
- Dallas Arizona Tile
- Tile & Slab FAQs
- Residential Tile & Slab Projects
- Marble Tile & Slabs
- Custom Fabricators
- Tile & Slab Cleaning Products
- Recycled Material
- Livermore Tile Showroom
- Countertop
- Tile Flooring
- Rancho Cordova Arizona Tile
- Livermore Natural Stone Slab Warehouse
- Commercial Tile & Slabs
- Tile Events and Shows
- Quartz Slabs
- Listelles & Medallions
- Cladding
- Tile
- Product Finder
- Las Vegas Arizona Tile
- Ceramic Tiles
- Tempe Arizona Tile
- Prescott Arizona Tile
- Kitchen Tile & Slab Projects
- Care of Surfaces
- Swimming Pool Tile
- Porcelain Tiles
- Interior Tile & Slab Projects
- Bathroom Tile Projects
- Sustainability
- Pool & Patio Tiling
- Granite Tile & Slabs
- Backsplash


